


Using the emergency puncture repair kit
Overview
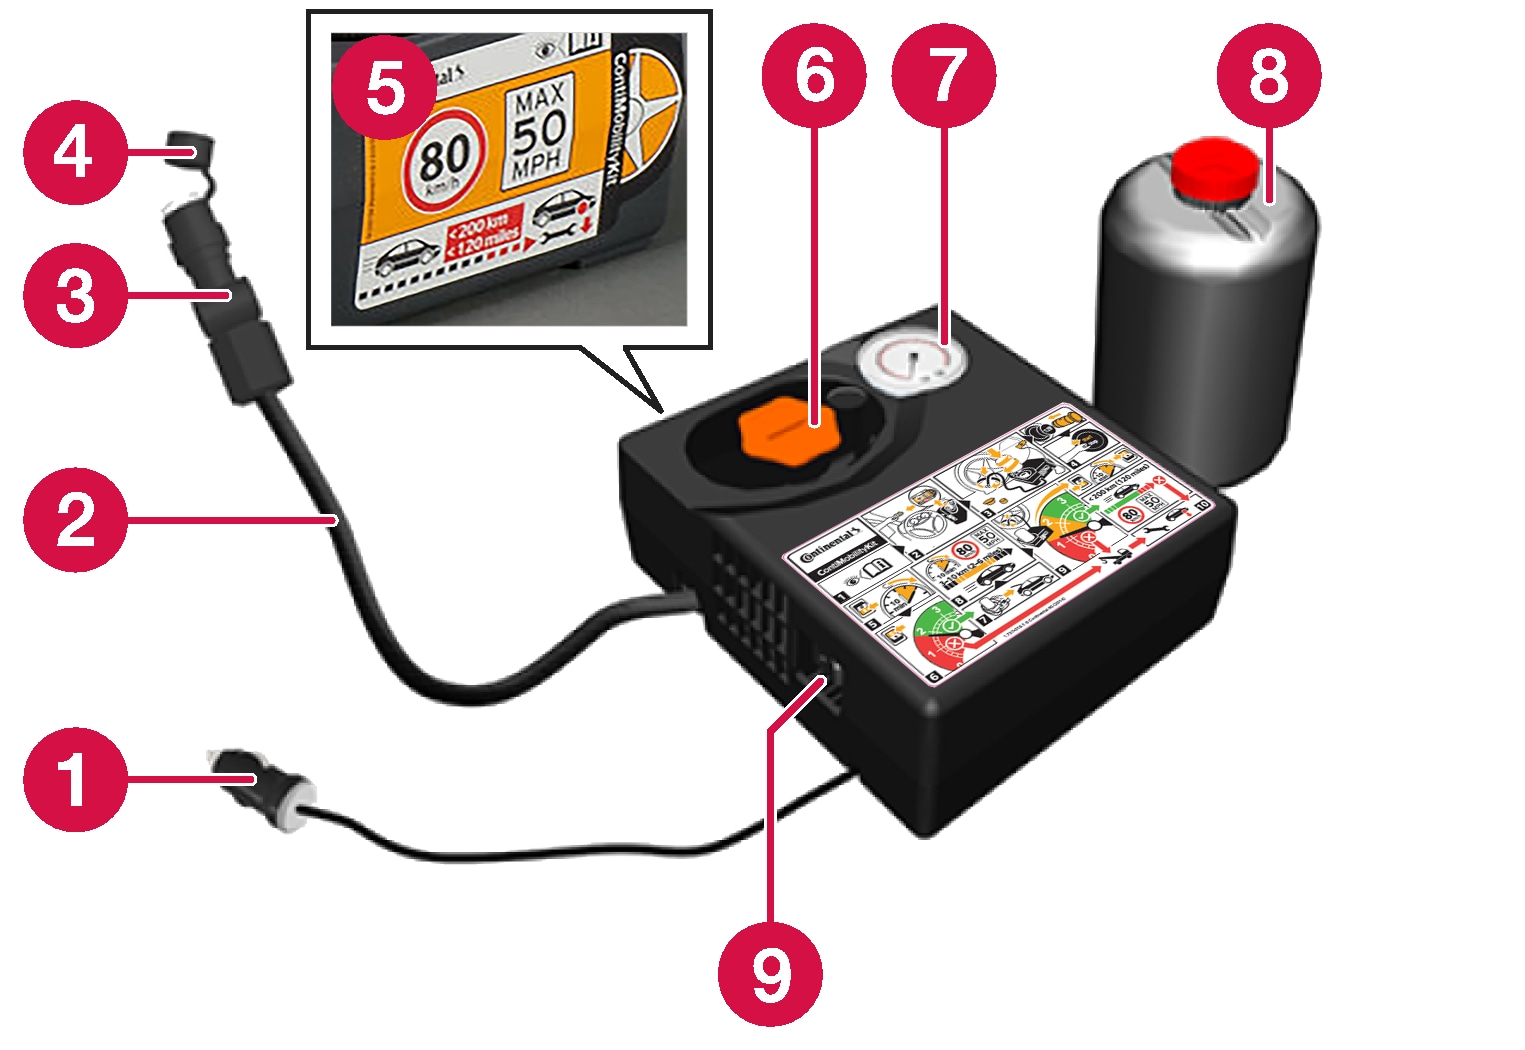
 Electrical cable
 Air hose
 Pressure reducing valve
 Protective cap
 Label, maximum permitted speed
 Bottle holder (orange cap)
 Pressure gauge
 Sealing fluid bottle
 Switch
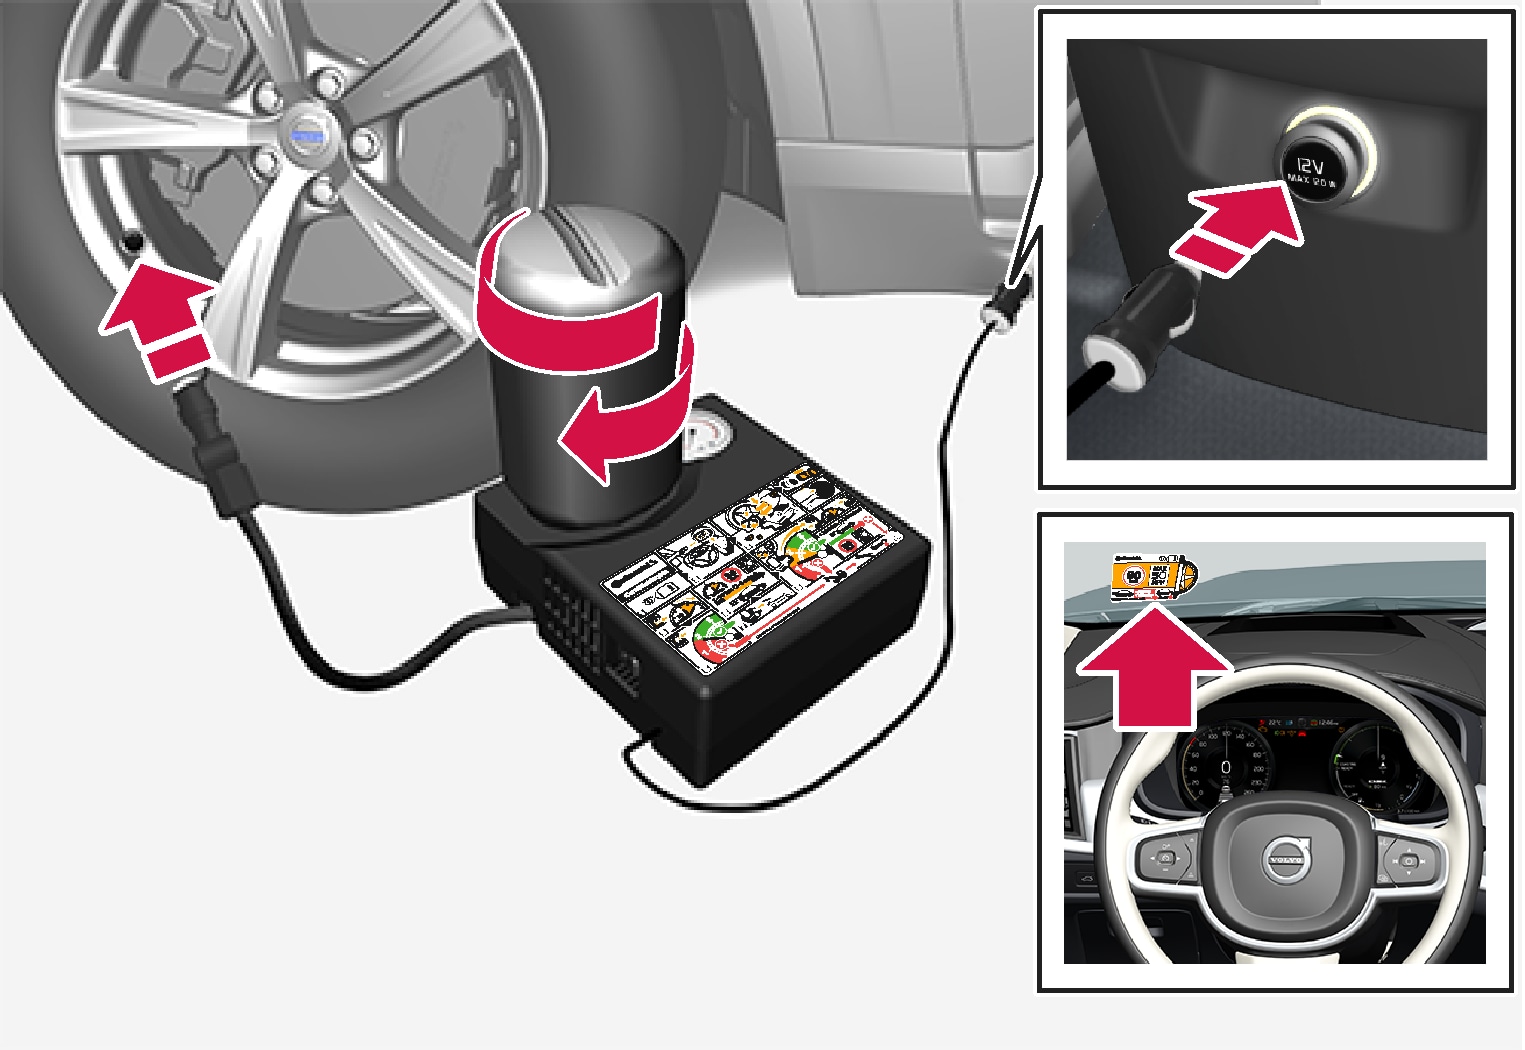
Connecting
Set up the warning triangle and activate the hazard warning lights if a tyre is being sealed in a trafficked location.
If the puncture was caused by a nail or similar, allow this to remain in the tyre. It helps to seal the hole.
Note
Warning
- In the event of skin contact with the sealing fluid, it must be washed off immediately with soap and plenty of water.
- Sealing fluid that makes contact with an eye must be rinsed away immediately with eye wash fluid or with plenty of water. If the discomfort persists then the eye should be examined by a doctor.
Warning
Unscrew the tyre's dust cap.
Check that the pressure reducing valve on the air hose is fully screwed on, and screw in the air hose's valve connection to the bottom of the tyre valve's thread.
Note
Warning
Warning
Note
Important
Warning
Note
Warning
Follow-up inspection
Connect the air hose on the tyre valve and screw in the valve connection to the bottom of the tyre valve's thread. The compressor must be switched off.
Read the tyre pressure on the pressure gauge.
- If it is below 1.3 bar then the tyre is insufficiently sealed. The journey should not be continued. Contact a tyre centre.
- If the tyre pressure is higher than 1.3 bar, the tyre must be inflated to the pressure specified in accordance with the tyre pressure label on the driver side door pillar (1 bar = 100 kPa). Release air using the pressure reducing valve if the tyre pressure is too high.
If the tyre needs to be inflated:
- Connect the electrical cable to the closest 12 V socket and start the car.
- Start the compressor and inflate the tyre to the pressure specified in accordance with the tyre pressure label.
- Switch off the compressor.
Remove the tyre sealing equipment, fit the protective cap on the air hose and fold the hose in the box.
Place TMK in the cargo area.
Warning
Note
- After a tyre has been inflated, always refit the dust cap in order to avoid damage to the valve from gravel, dirt, etc.
- Only use plastic dust caps. Metal dust caps can rust and become difficult to unscrew.
Note
Warning
Volvo recommends that the car is driven to the nearest authorised Volvo workshop for the replacement/repair of the damaged tyre. Advise the workshop that the tyre contains sealing fluid.