Raise the car

Note
Volvo recommends only using the jack that belongs to the car model in question. If a jack is selected other than the one recommended by Volvo, follow the instructions supplied with the equipment.
The normal car jack is only designed for occasional, short-term use, such as when changing a wheel after a puncture. If the car is to be jacked up more often, or for a longer time than is required just to change a wheel, use of a garage jack is recommended. In this instance, follow the instructions for use that come with the equipment.
Warning
- Apply the parking brake and set the gear selector in Park position (P).
- Chock the wheels standing on the ground using solid wood blocks or large stones.
- Check that the jack is not damaged, that the threads are thoroughly lubricated and that it is free from dirt.
- Check that the jack is resting on a firm, level surface that is not slippery and is not slanted.
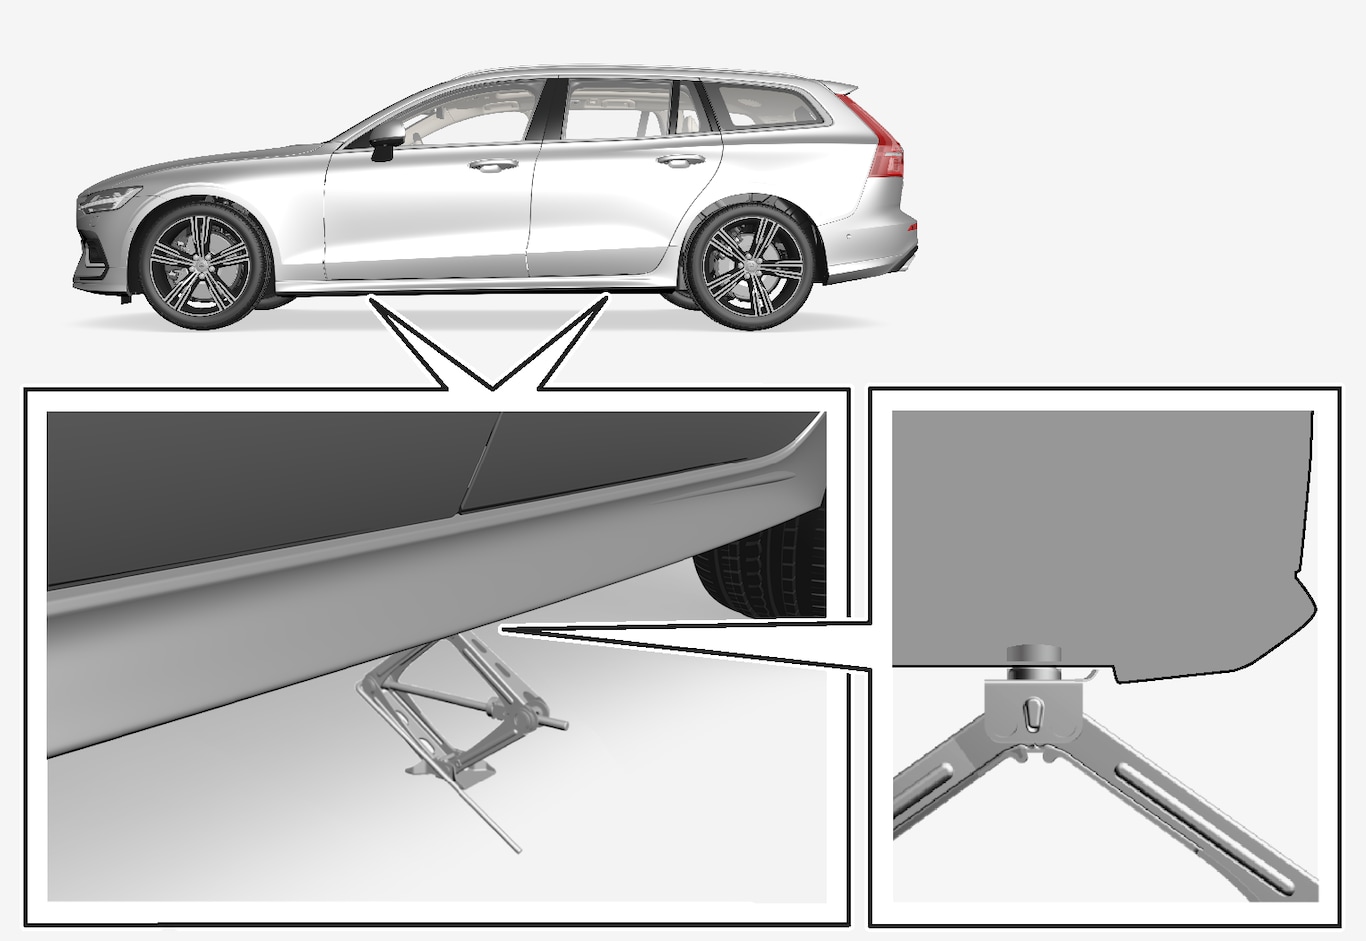
- The jack must be correctly attached in the jack's bracket.
- Never position anything between the ground and the jack, or between the jack and the car's jacking point.
- Passengers must leave the car when it is raised on the jack.
- If a wheel must be changed in a trafficked environment, passengers must stand in a safe place.
- Use a jack designed for the car when changing tyres. Use supports to secure the car for all other work.
- Never crawl underneath the car and do not extend any part of your body under the car when it is raised by a jack.
Warning
When not in use, the jack* should be stored in its stowage space under the cargo area floor.
Set up the warning triangle and activate the hazard warning lights if, for example, a tyre is being changed in a trafficked location.
Note
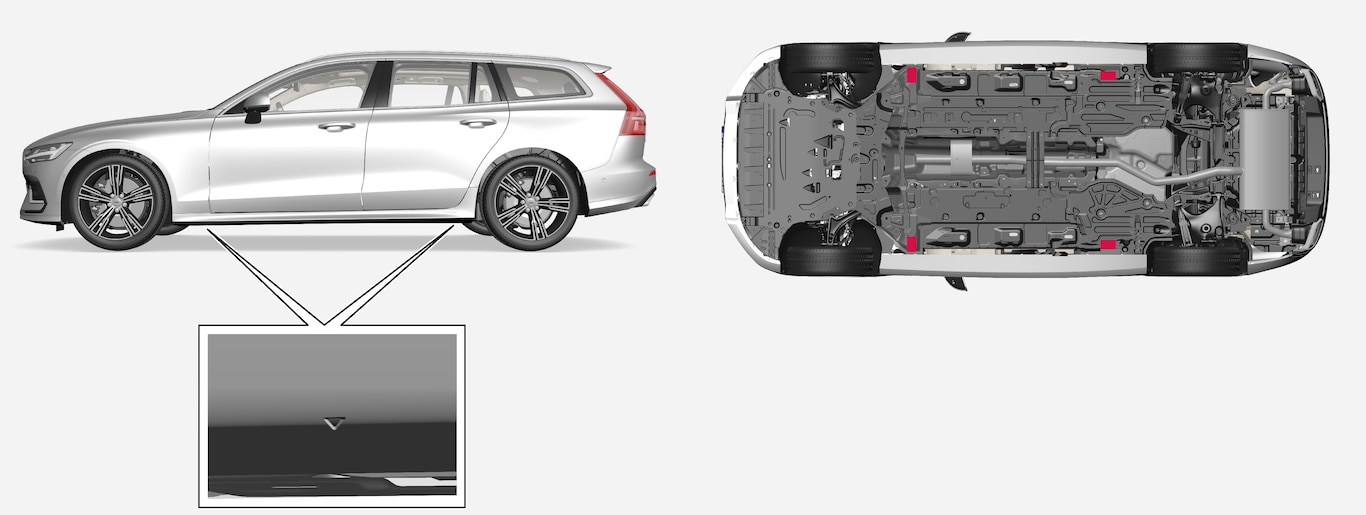
Position the jack or the lift arms at the designated spots of the car's undercarriage. Arrows along the bottom edge of the side of the car mark where the jacking points/lifting points are located. There are two jacking points on each side of the car. There is a recess for the jack at each point.
