Removing panels under the hood

To access certain components, such as fuses and jump-start charging points, one or more protective panels in the space under the hood may need to be removed.
P6-2037-XC40BEV-Panels under hood
Location of panels and parts under the hood.
  1. P5-Icon red circle 1
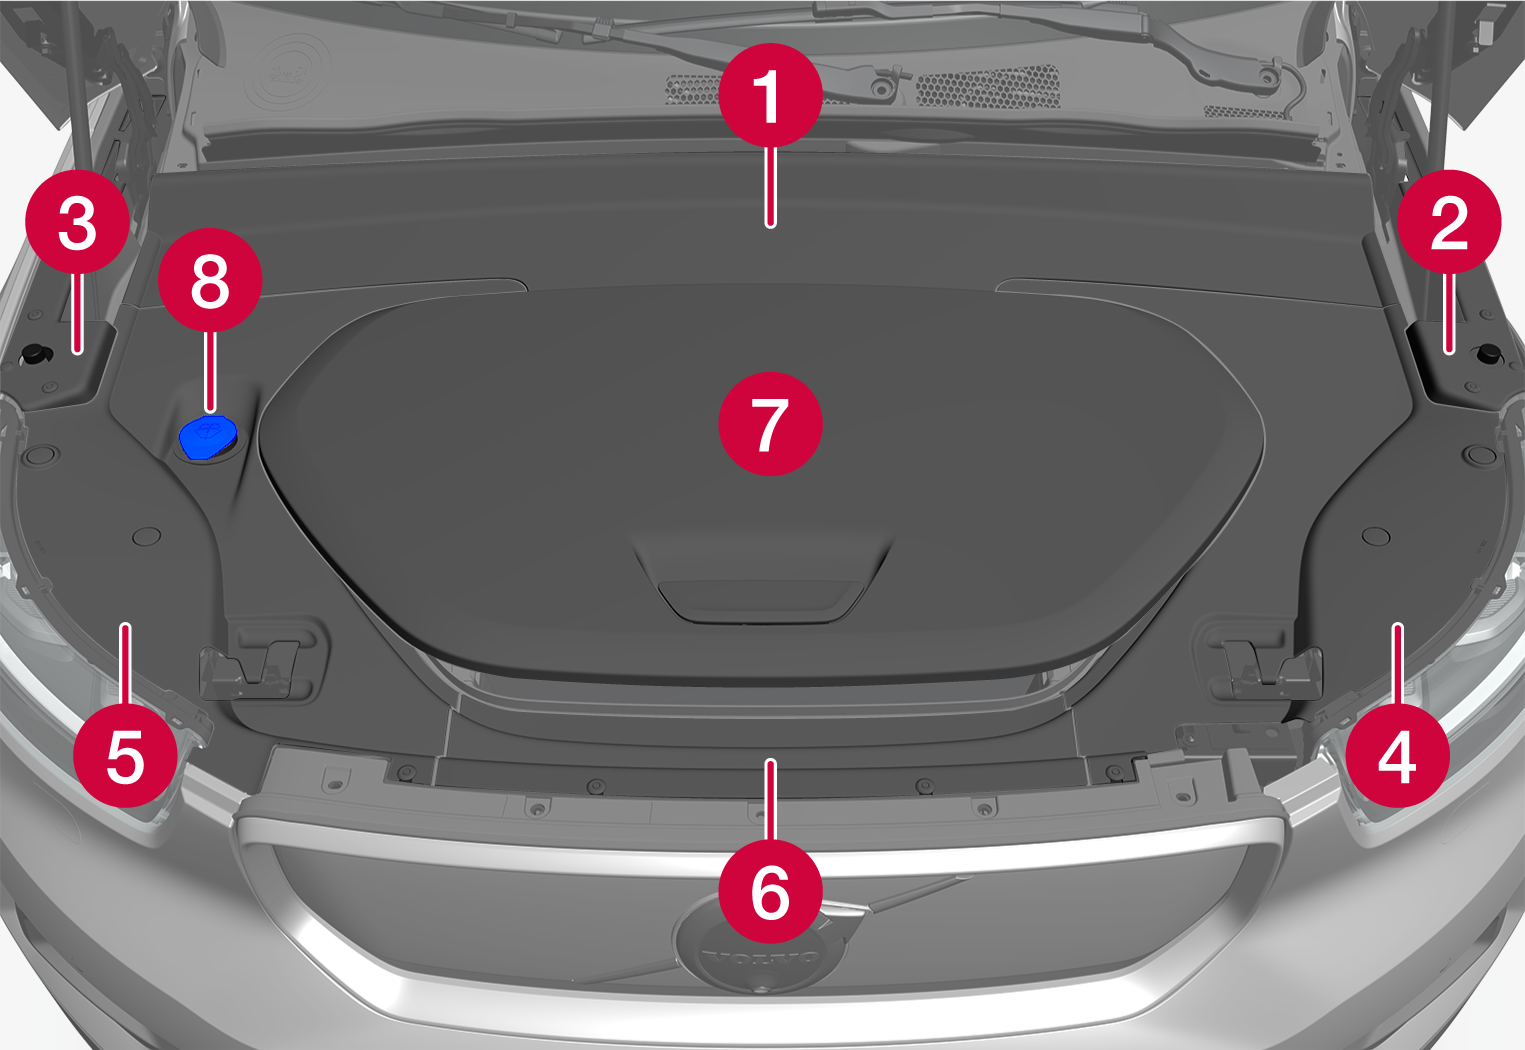
Panel A – provides access to the negative charging point for jump-starting.
  2. P5-Icon red circle 2Panel B
  3. P5-Icon red circle 3Panel C
  4. P5-Icon red circle 4Panel D – provides access to the positive charging point for jump-starting and to fuses under the hood.
  5. P5-Icon red circle 5Panel E
  6. P5-Icon red circle 6Panel F
  7. P5-Icon red circle 7Cover for storage compartment under the hood
  8. P5-Icon red circle 8Cap for filling washer fluid

 Important

Only remove the panels around the storage compartment under the hood if this requirement is clearly stated in the instructions in the Owner's Manual. Contact a workshop if you experience any problems or maintenance is required – an authorized Volvo workshop is recommended.

 Important

The panels are designed to protect the components behind them. Reinstall the panels completely to their original positions before driving the vehicle.

 Warning

A number of electrical components in the vehicle use high-voltage current and can be extremely dangerous if handled incorrectly. Do not touch anything that is not clearly described in this Owner's Manual.

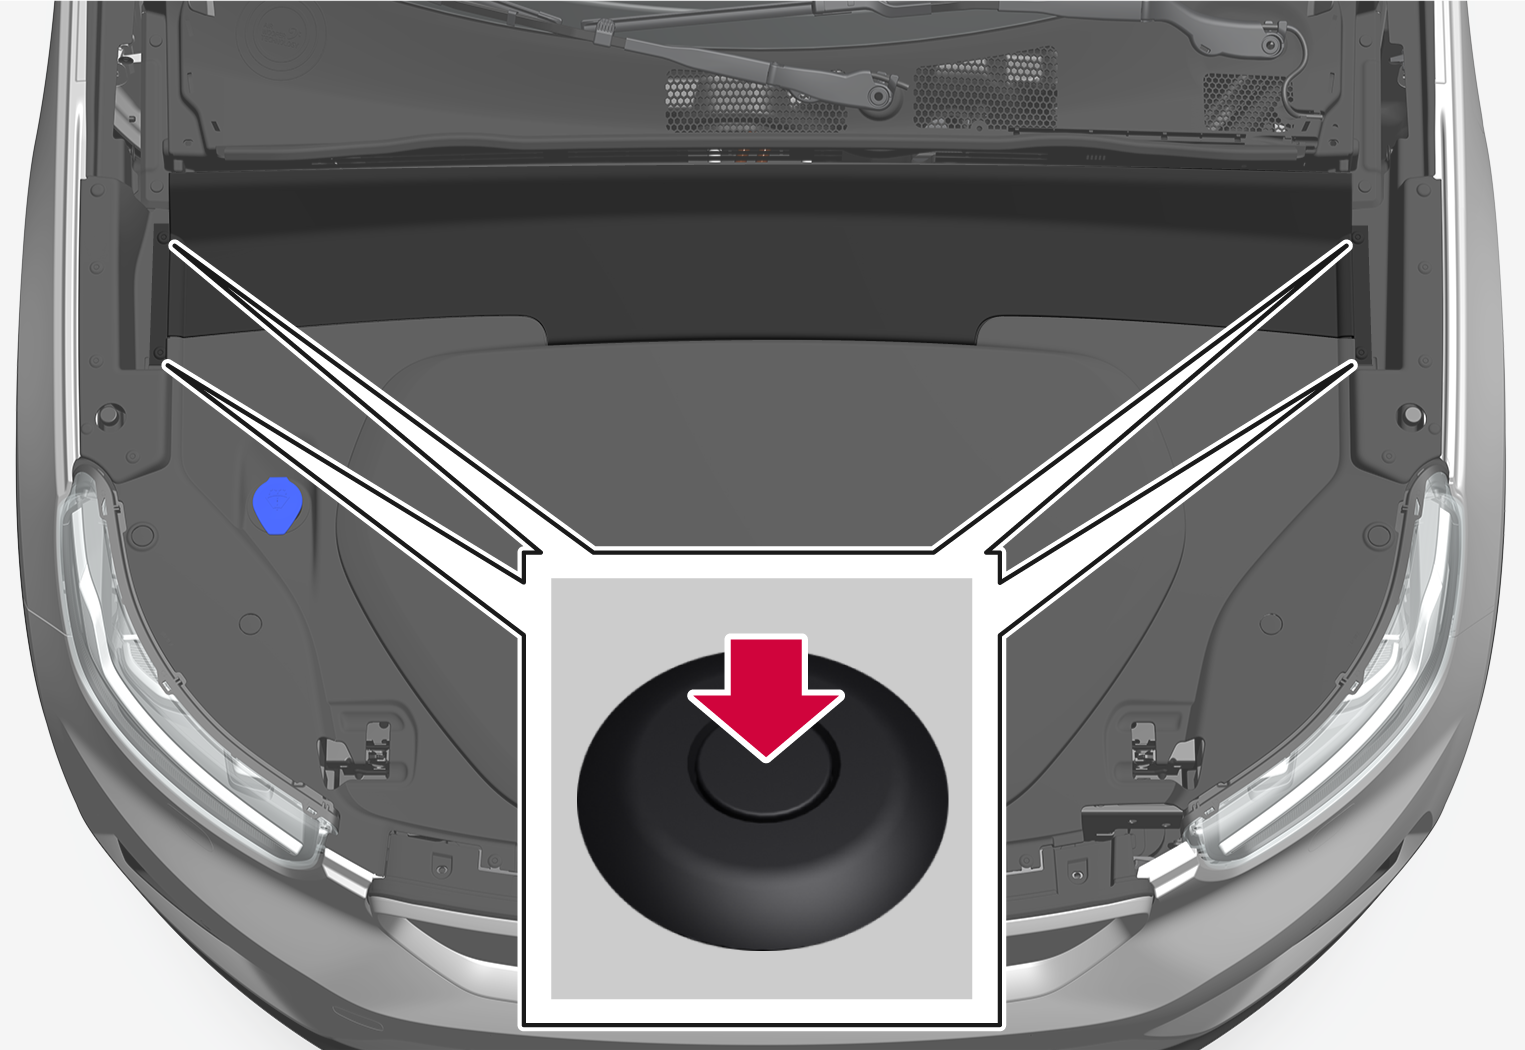
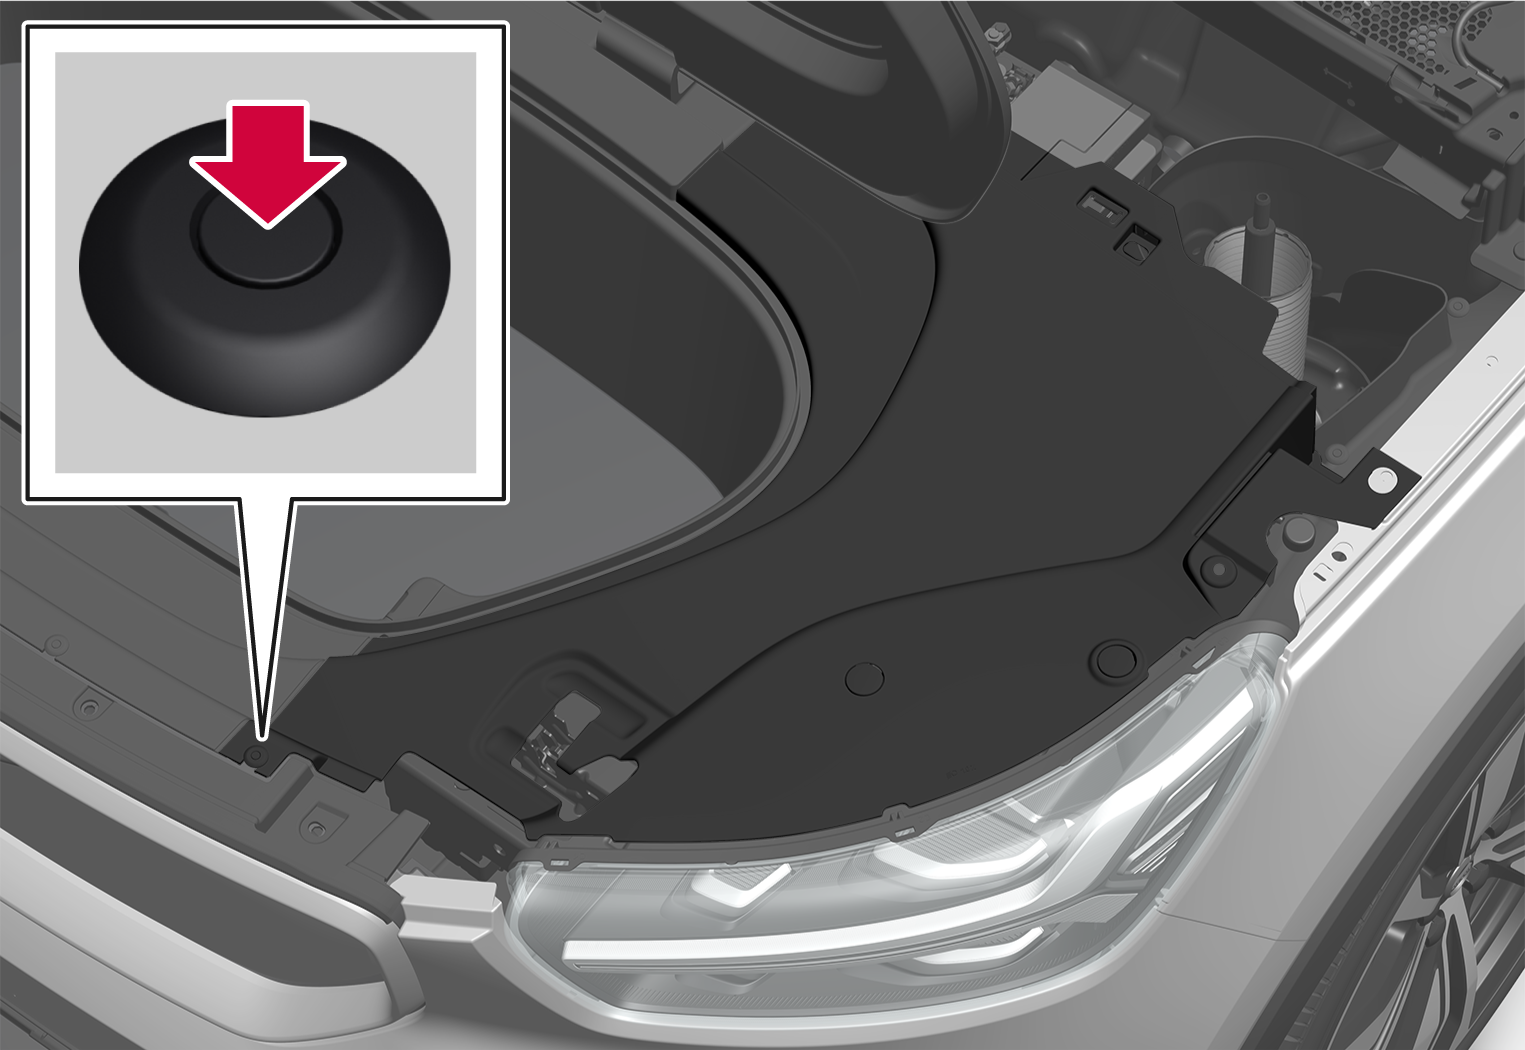
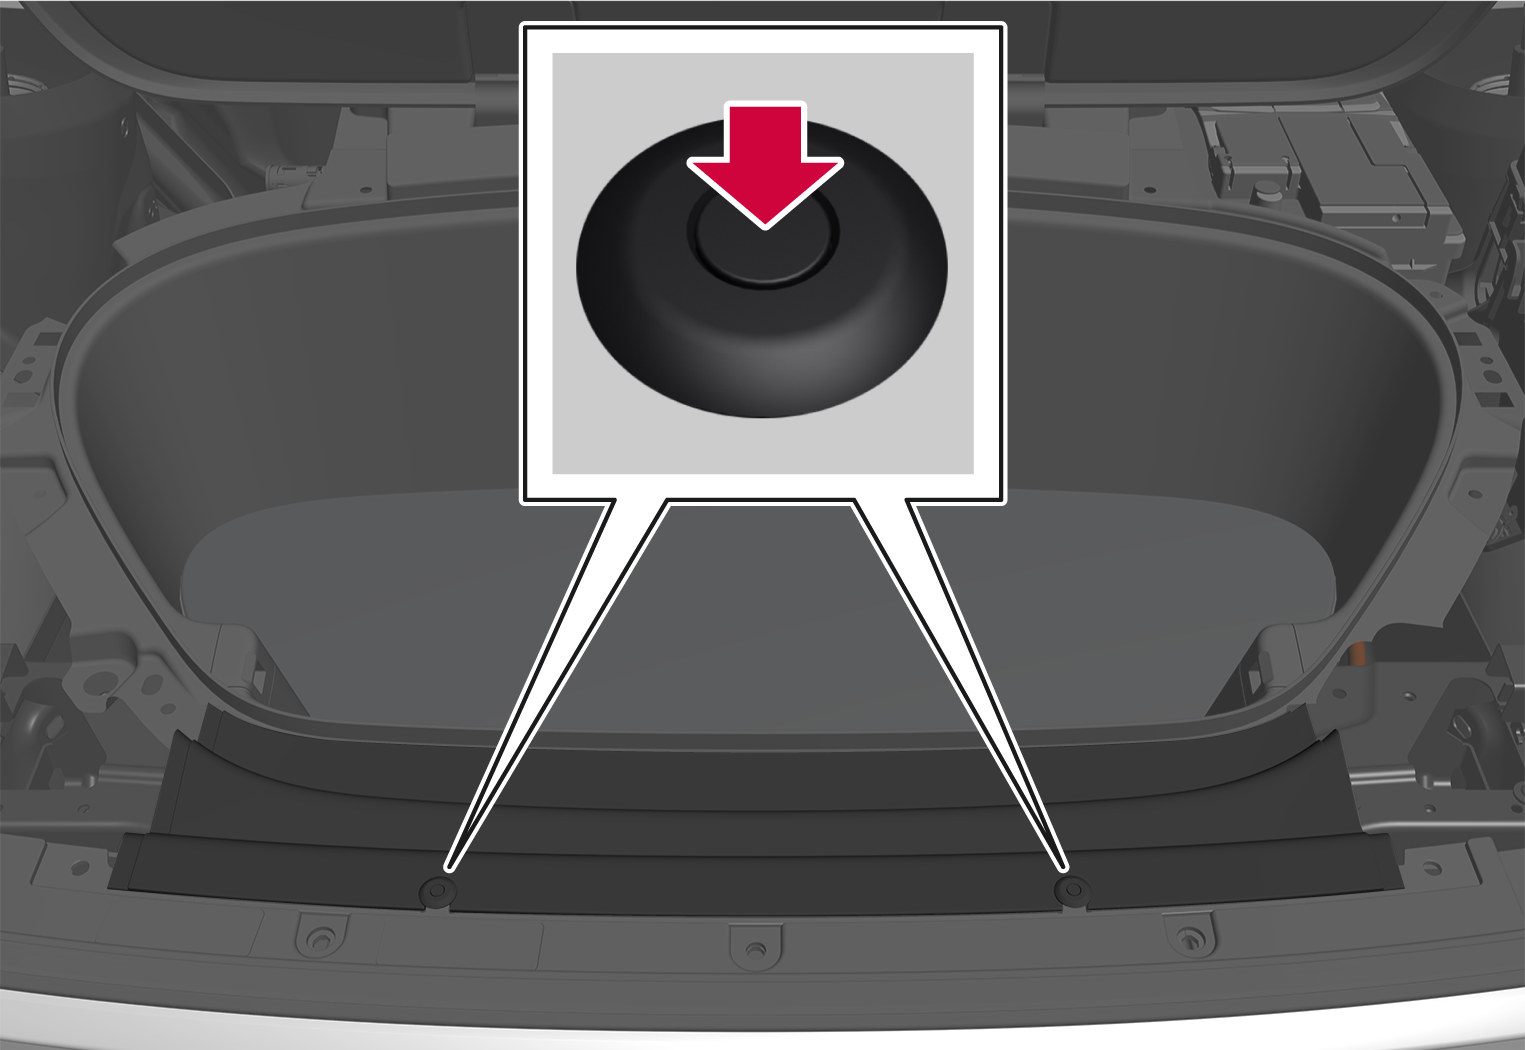
The protective panels are held in place with plugs. To remove these plugs, use a screwdriver, pen or similar to press in the locking pin in the middle of the plug. When the pin is pressed in far enough, the plug can be pulled out. Avoid pushing the pin all the way through the plug, as this could cause it to dislodge and fall down between components. When reinstalling the panel, pull the locking pin out completely before reinserting the plug. When the plug is inserted in the attachment hole, push the pin into place again to secure the panel.

Because the protective panels overlap one another, they must be removed and installed in a certain order. To remove the panels, follow these steps:

P6-2037-XC40BEV-Removal of panel under hood 1
Plug positions for panel A.
Panel A
Remove the 4 plugs holding the panel by pressing down their locking pins slightly.
The panel is now held in place by the hidden snaps. Lift the panel carefully until these unsnap.
The panel can now be removed completely. This provides access to the negative charging point and the panels B and C. Panel B must be removed for access to Panel D, under which the positive charging point and fuses under the hood are located.

To replace the panel, pull out the locking pins completely and push them in again once the plugs are positioned in the attachment holes. Make sure that the snaps are positioned correctly before pushing the panel into place.

P6-2037-XC40BEV-Removal of panel under hood 2
Plug positions for Panel B. Panel C positions are the reverse of those for Panel B.
Panel B/C
Remove Panel A first according to the previous instructions.
Remove the 5 marked plugs.
The panel is now detached and can be removed completely. This will provide access to plugs that attach Panel D or E, depending on side. Panel D must be removed to access the positive charging point and fuses under the hood.

To replace the panel, pull out the locking pins completely and push them in again once the plugs are positioned in the attachment holes. The panel also has a protruding part at the rear that helps hold it in place as it is being positioned in its hole.

P6-2037-XC40BEV-Removal of panel under hood 3
Plug positions for Panel D. Panel E positions are the reverse of those for Panel D.
Panel D/E
First remove Panels A and B/C, depending on side, and then open the cover for the storage space under the hood (7).
Remove the marked plug. To remove Panel E, the washer fluid cap (8) must also be removed.
The panel is now held in place by the hidden snaps. Lift the panel carefully until these unsnap.
The panel is now detached and can be removed completely. The positive charging point and fuses under the hood are located under Panel D.

To replace the panel, pull out the locking pins completely and push them in again once the plugs are positioned in the attachment holes. Make sure that the snaps are positioned correctly before pushing the panel into place.

P6-2037-XC40BEV-Removal of panel under hood 4
Plug positions for Panel F.
Panel F
First remove Panels A, B, C, D and E.
Remove the 2 marked plugs.
The panel is now held in place by the hidden snaps. Lift the panel carefully until these unsnap.
The panel is now detached and can be removed completely.

To replace the panel, pull out the locking pins completely and push them in again once the plugs are positioned in the attachment holes. Make sure that the snaps are positioned correctly before pushing the panel into place.