Removing the panels under the bonnet

There is the option to remove a number of protective panels in the space under the bonnet in order to access certain components, e.g. fuses and charging points for jump starting.
P6-2037-XC40BEV-Panels under hood
Location of different panels and parts under the bonnet.
  1. P5-Icon red circle 1
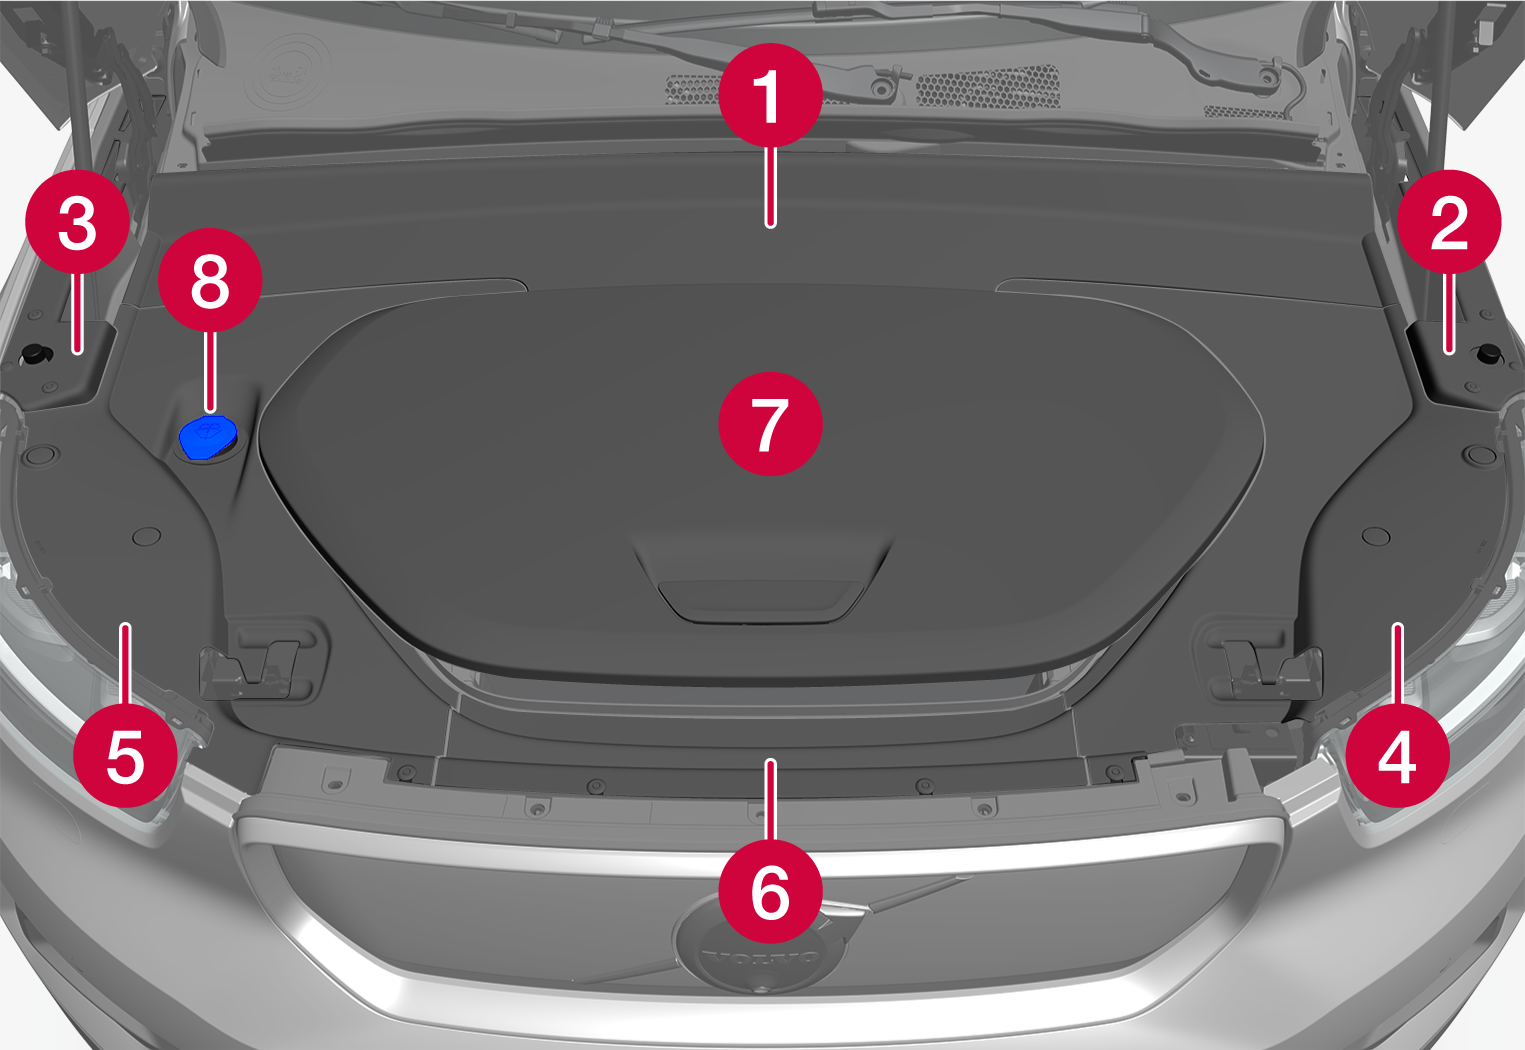
Panel A – provides access to the negative charging point for jump starting.
  2. P5-Icon red circle 2Panel B
  3. P5-Icon red circle 3Panel C
  4. P5-Icon red circle 4Panel D – provides access to the positive charging point for jump starting and fuses under the bonnet.
  5. P5-Icon red circle 5Panel E
  6. P5-Icon red circle 6Panel F
  7. P5-Icon red circle 7Hatch for storage compartment under the bonnet.
  8. P5-Icon red circle 8Cap for filling the washer fluid.

 Important

Only loosen the panels around the storage area under the bonnet if the instructions in the owner's manual explicitly state that this is necessary. Contact a workshop in the event of a problem or if maintenance is required – an authorised Volvo workshop is recommended.

 Important

The panels are designed to protect the components behind them − fully reinstall the panels before driving the car.

 Warning

Several components in the car work with high-voltage current that could be dangerous in the event of incorrect intervention. Do not touch anything that is not clearly described in the owner's manual.

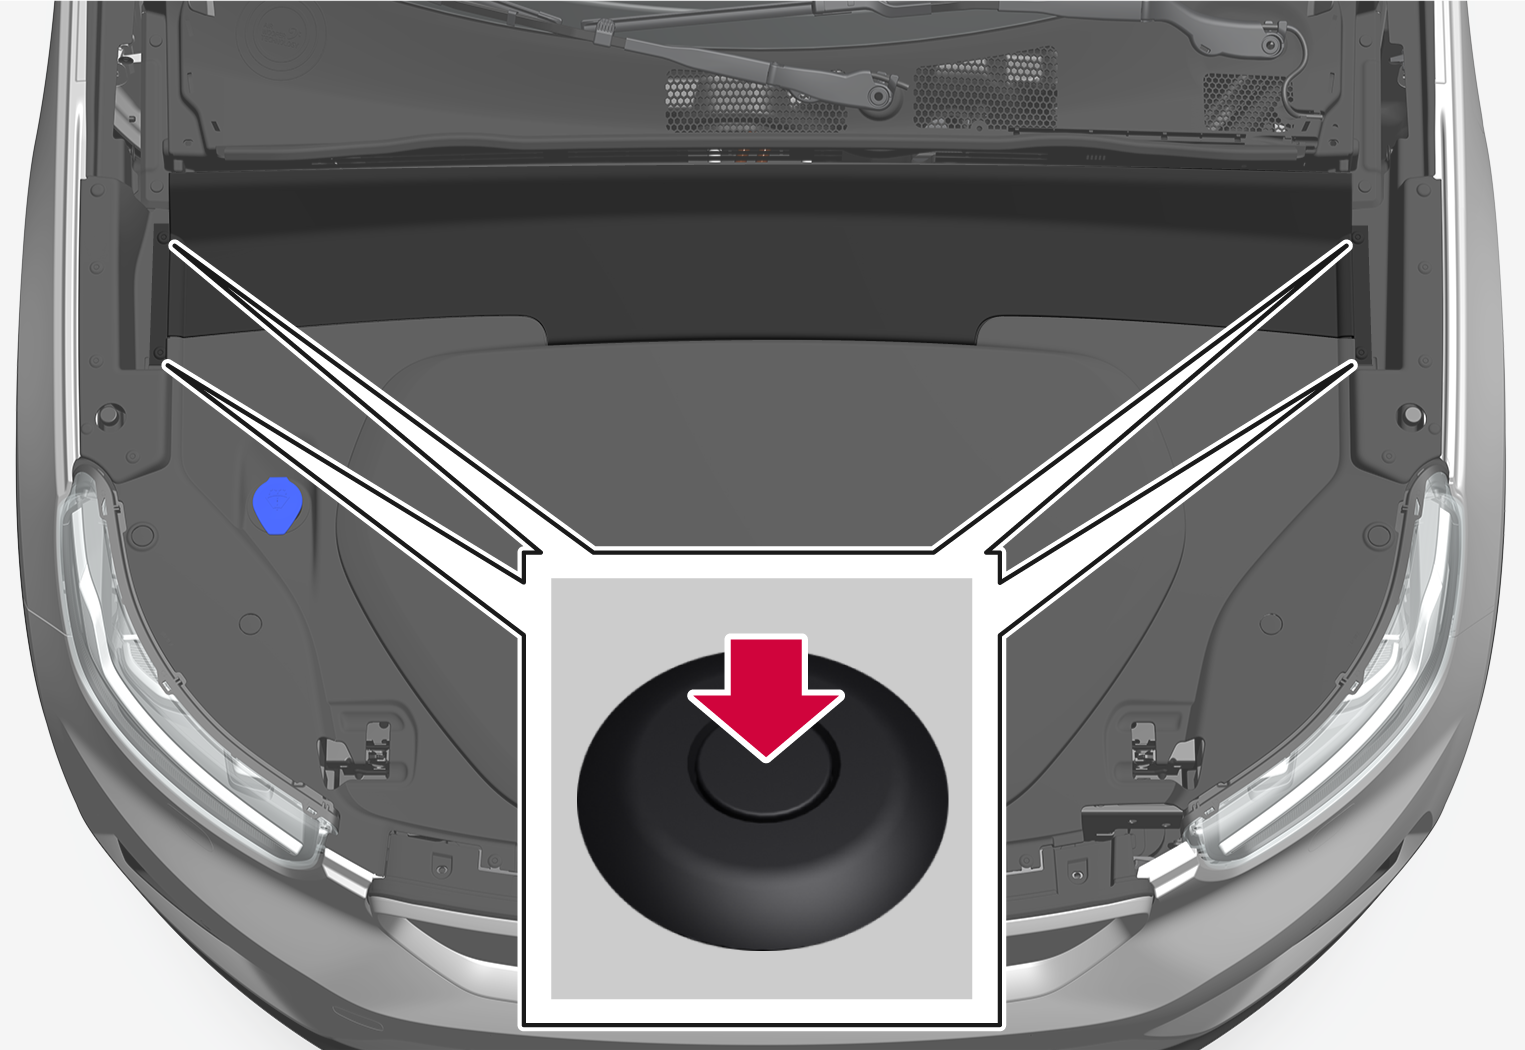
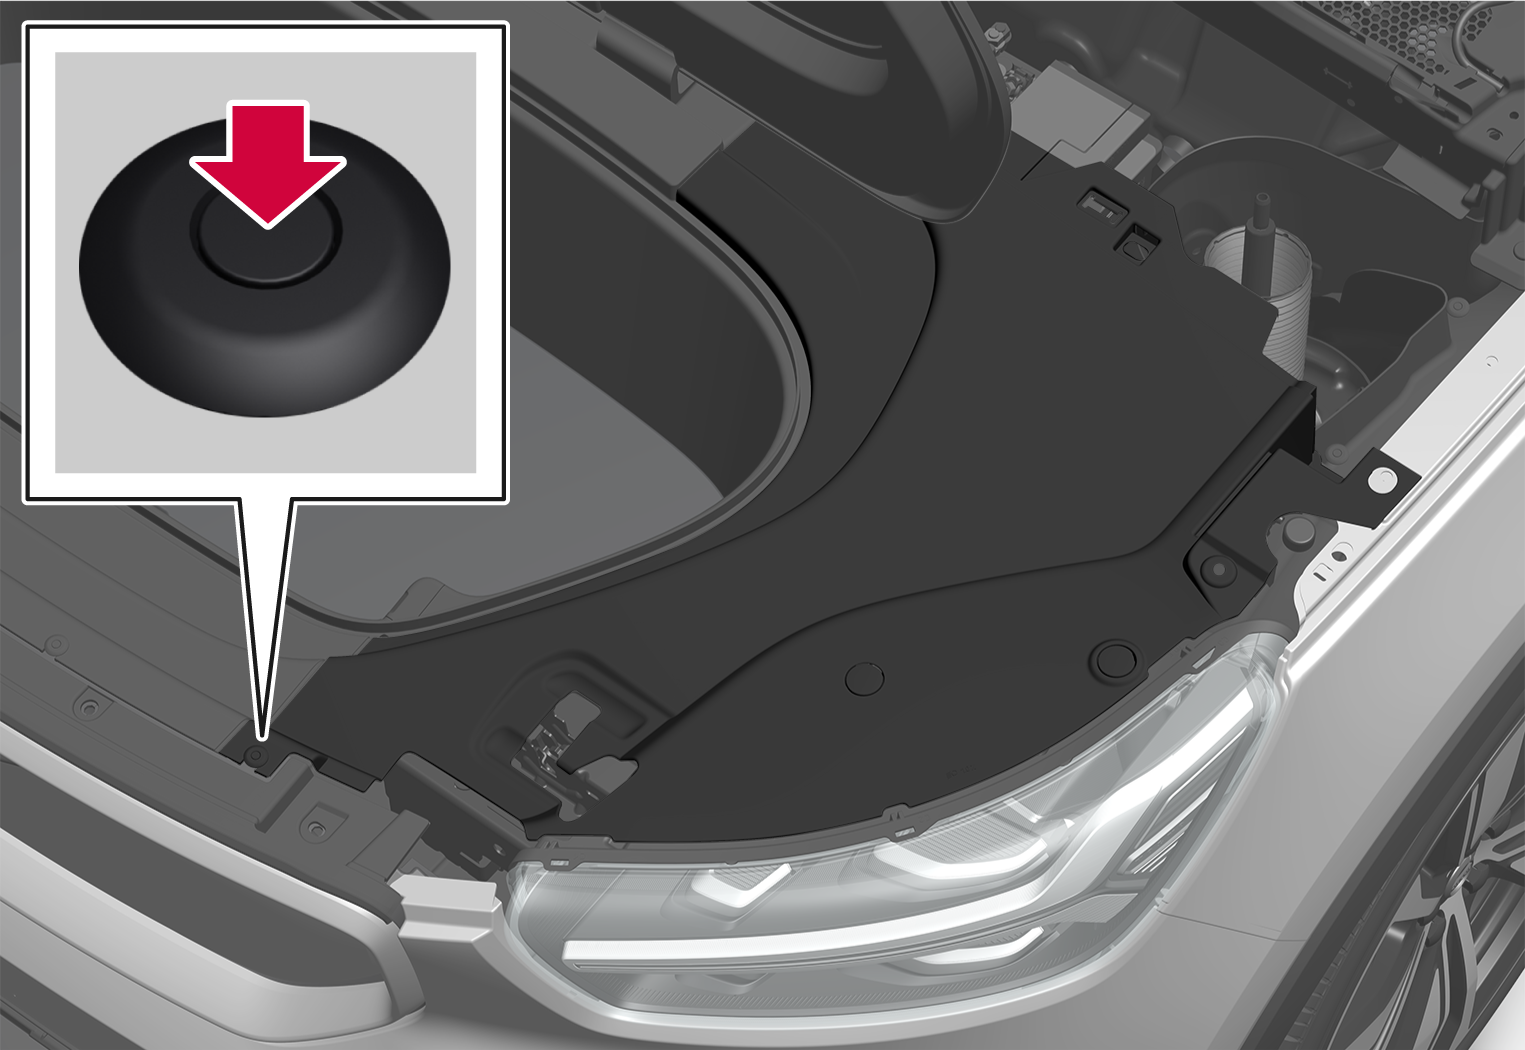
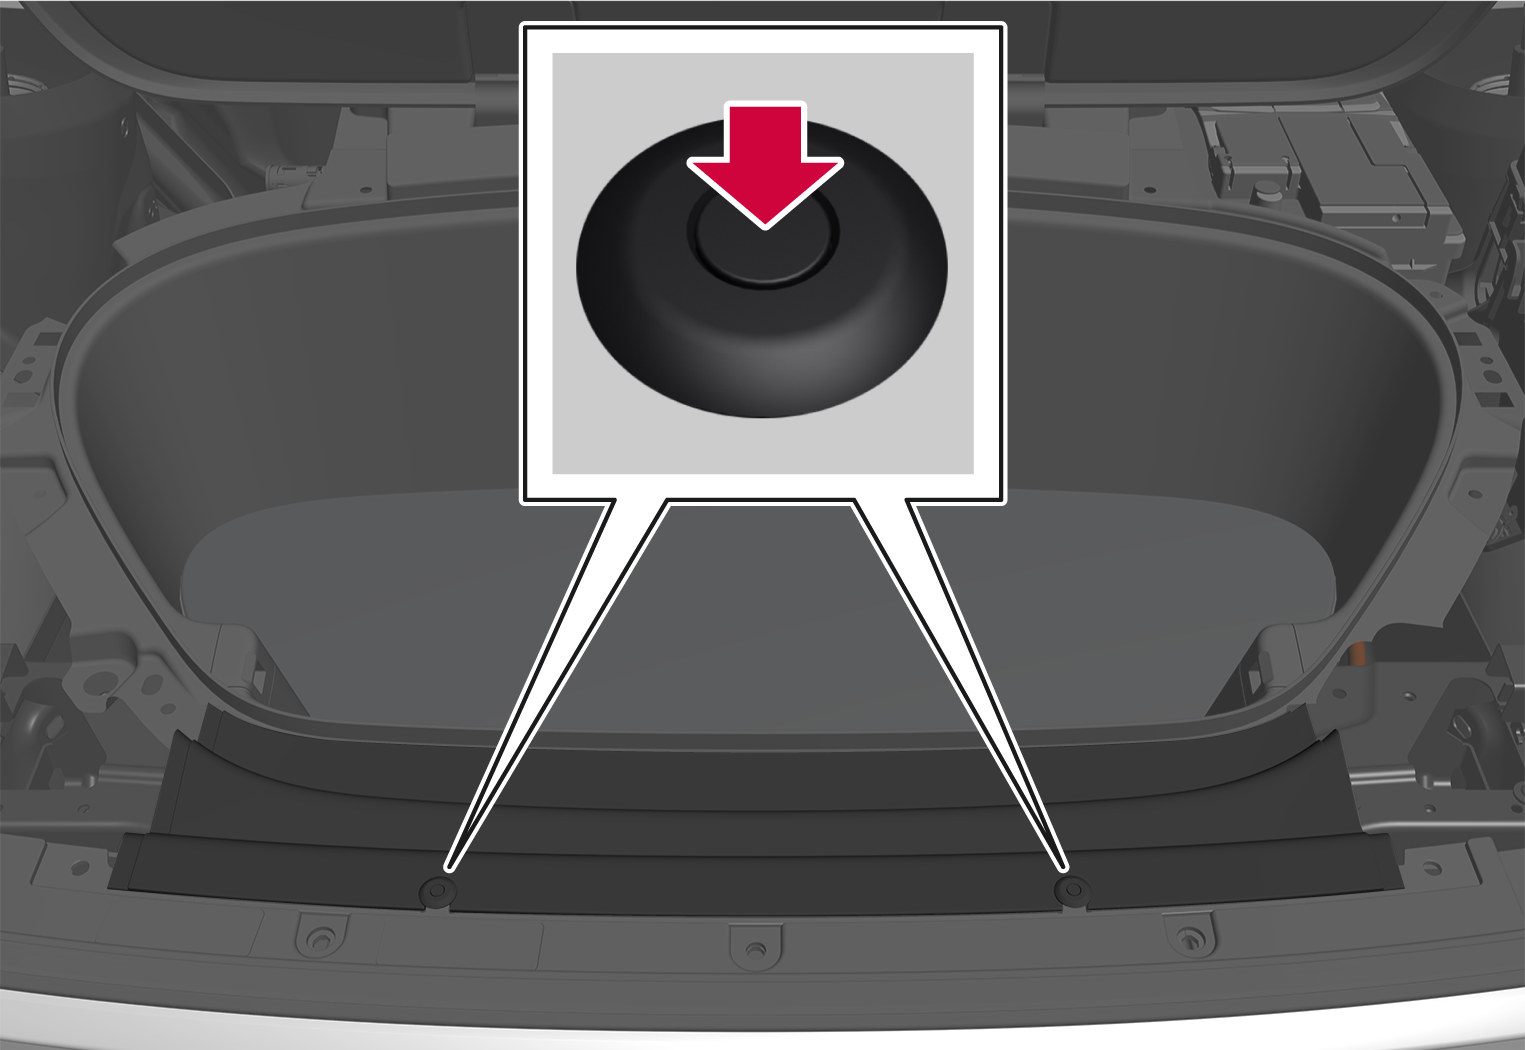
The protective panels are held in place using plugs. Loosen them by pressing in the locking pin in the centre of the plug, e.g. using a screwdriver or a pen. Once you have pressed in the pin a sufficient distance, you can pull the plug out. Avoid pressing the pin the whole way through the plug in order to prevent it from falling between components. Pull the locking pin out completely when reattaching the plug to reinstall the panel. Once the plug is positioned in the mounting hole, the locking pin can be pressed into place again, which secures the panel.

A specific sequence should be followed when removing or installing the protective panels due to the way in which they overlap each other. To detach the panels, follow the steps below:

P6-2037-XC40BEV-Removal of panel under hood 1
Plug positions for panel A.
Panel A
Loosen the 4 marked plugs that attach the panel by pressing in their lock pins a short way.
The panels are now held in place by hidden snap fasteners. Carefully lift the panel until they release.
You can lift the panel away completely. This provides access to the negative charging point and the panels B and C. Panel B must be removed for access to panel D, located under which are the positive charging point and fuses under the bonnet.

To refit the panel, pull the lock pins out fully, and press them in again when the plugs are positioned in their assembly holes. Make sure that the snap fasteners are correctly positioned before pressing the panel into place.

P6-2037-XC40BEV-Removal of panel under hood 2
Plug positions for panel B. Panel C is reversed in relation to B.
Panel B/C
First, fully remove panel A according to the instructions above.
Release the 5 marked plugs.
The panel is loose and can be lifted away completely. This provides access to the plugs that attach panels D or E, depending on the side. Panel D must be removed for access to the positive charging point and fuses under the bonnet.

To refit the panel, pull the lock pins out fully, and press them in again when the plugs are positioned in their assembly holes. The panel also has a protruding part in the rear end that holds it in place when it has been fitted into its hole.

P6-2037-XC40BEV-Removal of panel under hood 3
Plug positions for panel D. Panel E is reversed in relation to D.
Panel D/E
First remove panels A and B/C, depending on the side, and open the hatch for the storage compartment under the bonnet (7).
Release the marked plug. To remove panel E, the cap for filling the washer fluid (8) must also be removed.
The panels are now held in place by hidden snap fasteners. Carefully lift the panel until they release.
The panel is loose and can be lifted away completely. Located under panel D are the positive charging point and the fuses under the bonnet.

To refit the panel, pull the lock pins out fully, and press them in again when the plugs are positioned in their assembly holes. Make sure that the snap fasteners are correctly positioned before pressing the panel into place.

P6-2037-XC40BEV-Removal of panel under hood 4
Plug positions for panel F.
Panel F
First remove panels A, B, C, D and E.
Release the 2 marked plugs.
The panels are now held in place by hidden snap fasteners. Carefully lift the panel until they release.
The panel is loose and can be lifted away completely.

To refit the panel, pull the lock pins out fully, and press them in again when the plugs are positioned in their assembly holes. Make sure that the snap fasteners are correctly positioned before pressing the panel into place.