Spare wheel*
The following instructions only apply if a spare wheel has been purchased as an accessory for the car. If the car is not equipped with a spare wheel - see information about Emergency puncture repair (TMK).
The spare wheel (Temporary spare) is only intended for use temporarily and must be replaced by an ordinary wheel as soon as possible. The car's handling may be altered by the use of the spare wheel. The spare wheel is smaller than the normal wheel. The car's ground clearance is affected accordingly. Pay attention to high kerbs and do not machine wash the car. If the spare wheel is fitted on the front axle, you cannot use snow chains at the same time. On all-wheel drive cars the drive on the rear axle can be disconnected. The spare wheel must not be repaired.
The correct tyre pressure for the spare wheel is stated in the tyre pressure table.
Important
- Never drive faster than 80 km/h with a spare wheel on the car.
- The car must never be driven fitted with more than one "Temporary Spare" wheel.
The spare wheel is supplied in a bag which must be secured on the cargo area floor using straps.
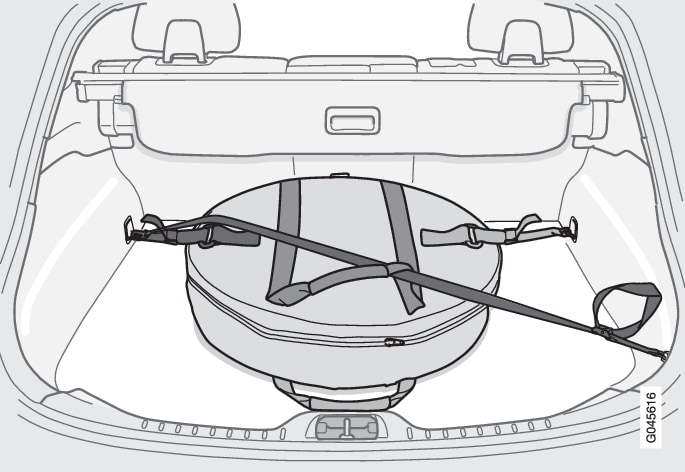
Turn the handle on the spare wheel bag out towards you. Attach the sewn-in tensioning strap hooks in the front load retaining eyelets. Attach the long strap into one of the front load retaining eyelets, run the strap diagonally over the spare wheel and through the upper handle. Tighten the short tensioning strap onto the long one. Attach the rear load retaining eyelet and tighten.
Before changing a wheel
To access the towing eye, open the hatch on the left-hand side of the cargo area.
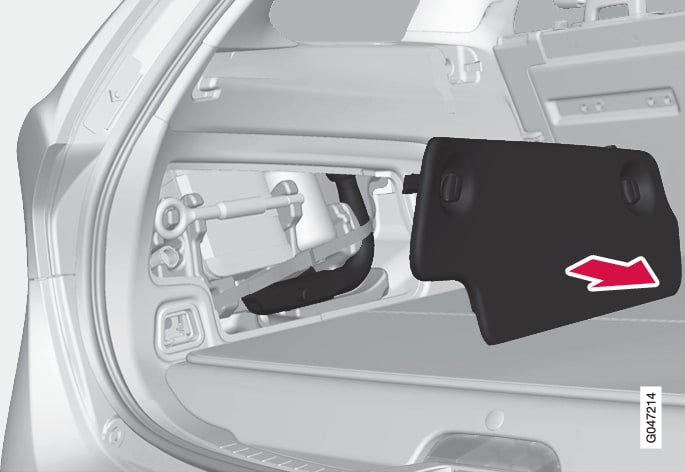
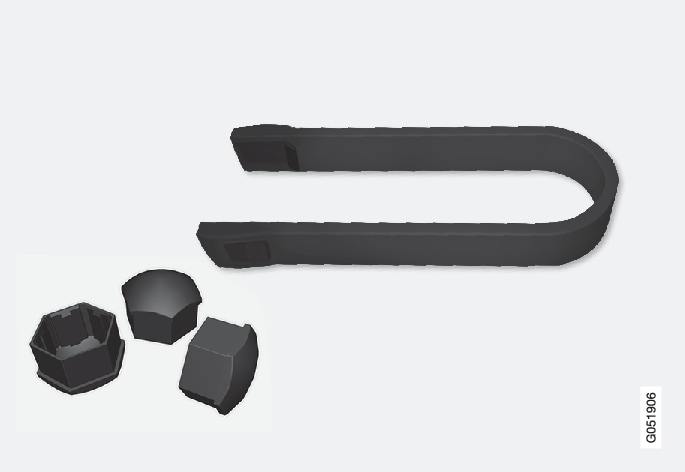
Take out the jack*, tool to remove the plastic caps on the wheel bolts and the wheel wrench* (located in a bag on the cargo area floor). If another jack is selected, see Raising the car.
Warning
Note
- If the car is not equipped with the accessory spare wheel then the jack need not be stored in the car.
- Volvo recommends only using the jack* that belongs to the car model in question, which is indicated on the jack's label.
- The decal also indicates the jack's maximum lift capacity at a specified lifting height.
Removing
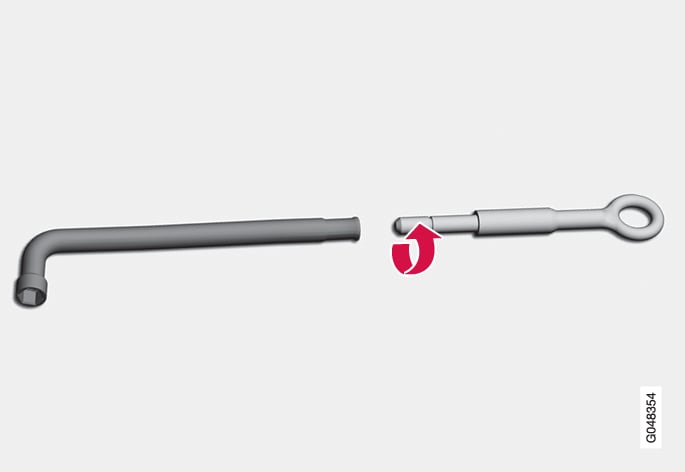
Screw together the towing eye with the wheel wrench* until the stop position in accordance with the following figure.
Important
Warning
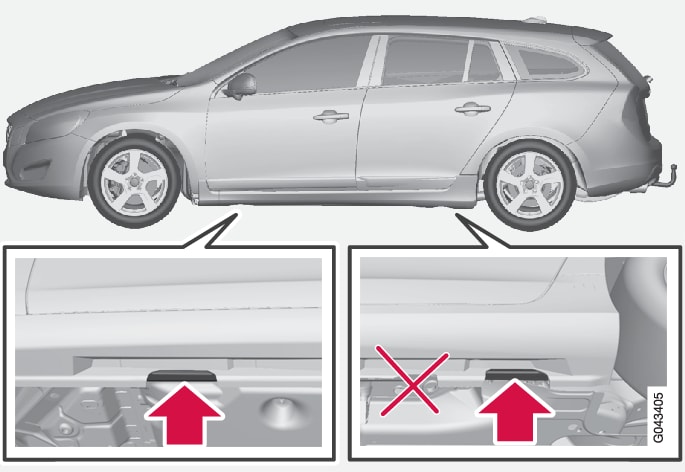
There are two jacking points on each side of the car. Wind up the jack so that the flange in the bodywork ends up in the notch in the head of the jack.
Important
Warning
Never crawl under the car when it is raised on the jack.
Passengers must leave the car when it is raised on the jack. If a wheel must be changed in a trafficked environment, passengers must stand in a safe place.